Navigation

Showing posts with label Easy. Show all posts

Monday, May 16, 2016

The Perfect Boiled Egg

This seems like a really stupid post when you say..."oh I think I will blog about a hard boiled egg!" But eggs are so incredibly versatile and the first question in every important long term relationship is "How do you like your eggs?" Well, this has taken me a while to get right...but when you know, you know...


I have finally perfected the hard boiled egg!

I have tried baking, starting in cold water, boiling water entire time, etc. The baking burned one side of mine, the cold water had me peeling shards of shell off for too long... But this! This is it.

Sure, the other methods work to cook the eggs, but I spent so much of my time peeling tiny pieces off the eggs, then they would be ugly and all nicked up. Some turned out too overcooked, some were too runny for my tastes. This has been my tried and true and I will never look back!

Here's how it's done. And if right now, you are saying, well I love my method and mine is the right way....that is wonderful! And you can stop reading here cause the rest of this post will not matter to you in the least.

The hardest part: Bring a small pot of water to a rolling boil.


CAREFULLY place your eggs into the hard boil with a spider or a spoon.  Immediately turn the heat to low and put 13 minutes on the clock.  The water will "slow it's roll"(pun intended) and reach a gentle simmer. Keep uncovered!


While they are simmering away, prepare yourself an ice bath to shock them once the 13 minutes are up. I do this in a small mixing bowl. Now go watch 12.5 minutes of Netflix (Jane the Virgin or Parks and Rec, just saying).


When you hear that beep on the timer, quickly but carefully scoop your boiled eggs from the water into the ice bath with your spider or spoon.


Once they are cooled (about 5 minutes) give them a swift knock on the countertop and peel away!


These are every so slightly underdone from what you would see at a salad bar, but these are so tasty and make a really creamy egg salad (mix with a quick squeeze of mayo and s&p).  I am telling you this because I eat egg salad 3-4 times a week now that I have mastered this egg boiling technique. So simple, yet such a game changer!


Try it just once! And if you hate them or it doesn't work for you, I will buy you 2 new eggs! Dig in.

Thursday, June 11, 2015

Grilling Season - Shrimp and Veggie Skewers

When I think of Spring and Summer, I think of patios, cold beers, outdoor concerts, pools and most of all GRILLING. You can cook pretty much anything on a grill if you want to. In this particular case, I wanted to grill things on sticks. Worked out in my favor pretty well if I do say... 


The main trick to grilling things on skewers or sticks, is that if you are grilling with wooden skewers, SOAK THEM IN WATER first. I found some bamboo skewers at Kroger. Mine were soaking for about an hour or so. If you are able to, just plug up the sink and let them swim around in there for a bit. Otherwise, you'll have some pretty charred up sticks.


I went for the basic veggie skewer: zucchini, yellow squash, red onion, red pepper, mushrooms, and tomatoes. If it can be skewered, try it out! The world is your oyster.

I skewered them in no particular order, but just made sure there was a variety on each stick.  Coat or spray with olive oil and sprinkle with salt and pepper.


The shrimp should be peeled and deveined - doused heavily with Old Bay (praise hands emoji for some Old Bay!) and about 5 fit on each skewer but it really depends on the size of your shrimp or your skewer. Say shrimp skewer five times fast...

A little secret for grilling shrimp: After putting all the seasoning on I gave them a quick spray with an olive oil spray to help them not stick too much to the grates on the grill.


Now for the fun part. Joey is the grill master here, so he cooked the veggies first over high heat, flipping occasionally with lid on until the veggies softened, around 10 minutes. You want the squash and zucchini to get tender and everything should be done by the time those are nice and charred.


The shrimp took about 3-4 minutes on each side, being very careful when you flip. Joey used tongs to grab end of skewer and rotated them over. When the shrimp are an opaque pink, you are good to go.


Serve it up!

It was a really quick dinner, pretty healthy and delicious! This will be a repeater all summer and into the fall!


Serves 3-4
1 lb shrimp peeled and deveined
2 red bell pepper, 1 inch cuts
1 red onion (really only need about a quarter) quartered
2 zucchini sliced into discs about 1/2 in
2 yellow squash sliced into discs about 1/2 in
10-15 baby bella mushrooms halved
Olive oil and salt and pepper
Old Bay ~ 1 tbsp

Pre-soak skewers in water for 1-2 hours
Carefully push veggies onto skewers - varying type of veggie. coat with olive oil and sprinkle with salt and pepper set aside
Carefully push shrimp onto skewers and season with salt, pepper, and lots of old bay

Grilling:
Grill on high heat - veggies first, for about 10-15 minutes rotating occasionally
On med-high heat - grill shrimp for about 3-4 minutes per side, rotating once or twice.

Note: our grill is really small. If you have a bigger propane grill you can do both at the same time!

That's it. Seriously. Now make that this weekend!! Easy and a lot better than the plain old chicken and veggies you have been making lately (true story!).


Friday, April 10, 2015

Perfect Salmon

I'm always a little nervous about cooking fish. I don't want to go into overkill and make it too overdone, but I don't want to poison my family with raw fish (j to the k). I have been working with a couple of ways to cook salmon and have figured out my favorite and what works best for us.  Baking it!


I also always thought salmon was a more challenging dish to make. After figuring out the right temp and time for baking it, it is just the same or easier than baked chicken breasts. And for my chicken hating husband, definitely more delicious.

At any butcher, you can specify how you want them to cut your salmon. In our case, we just picked a large piece from their selection, cut it in half with a sharp knife at home, and I freeze the rest for a rainy day. Tastes just as good, in my opinion! On this particular day the salmon was on sale! Yah!


I put a piece of foil on the baking sheet, spray with non-stick spray, and put the skin side down. I cook with the skin on, and when you are done you can easily flake the salmon away from the skin when eating or if you are careful not to burn yourself you can peel the skin right off.

Here's what I used;

1 lb salmon (we hungry folks- in all honesty, this could have served 3-4 people)
S&P
Lemon slices (however many you like...I'm not a huge lemony person but 3 was just right)
Olive Oil - drizzled about a tablespoon to coat before I added the s&p and lemon

Preheat your oven to 375. Bake for exactly 22 minutes.


Too good to be true? No, really, it's that easy.


Serve with your favorite beverage - I have taken a comfortable front seat on the Fat Tire bandwagon - and a couple of your fave sides and you are set!

Now that it's grilling weather, my next challenge will be to attempt salmon on the grill.

Now make this over the weekend and tell me how you like it!

Tuesday, January 28, 2014

Super Easy Southwest Chicken Salad


Adapted from the salad bar "signature salad" at work. Seriously, if you don't love a good salad bar, pssshhh. C'mon!!! You get to create your own thing!

The salad at work is my usual go-to. I love the really awesome chick that always makes me my special salad who knows I say "I want this already designed salad, but not this, and add this" and doesn't eye roll at me.  The standard salad at work goes a little something like this:

Combo of salad (you know the kind you get bagged at grocery)
Black Beans
Red Onion
Cherry Tomatoes
Corn
Shredded Cheddar
Tortilla Strips
Chipotle Lime Dressing
Chicken Strips

Sorry, place-of-work, that combo sounds great to most, but didn't work for this girl.

I always say - no red onion (onion breath at work is an afternoon ladykiller), no tomato, add red pepper. Switch for ranch dressing. I didn't say this was a healthy salad. Oy Vey.

The chicken is always meh at work, so I decided to change it up and get really fancy with it: season with Taco seasoning. Revolutionary, huh? 2 chicken breasts (for the 2 of us) at 350 degrees for 25 minutes and let them sit for about 5-10 so it doesn't completely wilt your salad.


I always tell my friend at work to 86 the tomatoes but I think I just have a thing - I don't like cherry tomatoes in a salad - sorry!! I do like chopped tomatoes…. Cherry Tomato,  Chopped Tomato? (Toe-may-toe, Toe-mah-toe?)

Anyway, I drained black beans and rinsed them because your salad would be a weird gray color and taste only of black beans and be soggy if you didn't... and drained a can of sweet whole kernel corn and put as much as I wanted of both on top of my salad mix! Yes, my salad mix. It's a big bag of crisp good stuff that I thought was fresh and had the most distant expiration date.. Just do what you want when you make your stuff! I bet this salad would be great with baby spinach, but it's a little too much for my boo. Plus, I always add way too much cheese for my own good that would make others be grossed out. This time I added a mexican cheese mix.


For the dressing I went a bit crazy. I had left over taco seasoning….and OMG added it to my bottled ranch dressing. It was awesome.


So I made my fave salad! What do you like on yours? I always love listening to the combos people request on theirs in line at work and they disgust me, but it makes them happy! I always wonder if the person behind me thinks I have horrible taste in salad toppings!

Plus, I am brainwashing my husband into thinking this salad is healthy….it is, sorta. ;-)


Tuesday, January 21, 2014

Chilly? Chili.

It's cold.

Time to make Chili.

One of my fave wedding gifts. A clutch item in the kitchen.

I never have claimed any recipes on this website as my own and I don't plan on doing it anytime soon. I   like to follow them and happen to do it well.

#1 rule EVER and it's so important and everything ever that is pure and good in chili. Ground Beef. 80/20. Just do it. You skinnies on a diet - Run an extra 5 minutes tomorrow.  I asked J if he wanted chili and his response was "only if it's made with ground beef". Sometimes (that's a stretch) we are healthy kids around here but when it comes to this comfort food, you keep it the right way.

This chili recipe is taken from one of my mom's BFFs, Margie. Its DELISH and doesn't need noodles. It's its own star of the show.

You: "What's Margie's secret!?"
Me: Bloemers

There is chili paste and chili powder in the Bloemer's line that is a must have. Also, when picking up ingredients don't forget the soup crackers (oyster crackers). Fun touch and always necessary for some crunch.

The Lineup

You're gonna need:

2 lb ground beef
2 cans mild chili beans (I prefer Brooks, but generic are fine)
1 packet  or 2 oz Bloemer's chili powder
1 8 oz package of Bloemer's chili paste/base
2 15 oz cans Hunt's tomato sauce
According to my dad - 3 chili bean cans of water (best kind of measurements)
S&P
Shredded Cheddar for topping
Optional: Chives and Sour Cream (I don't use these but if you want to, be my guest!)


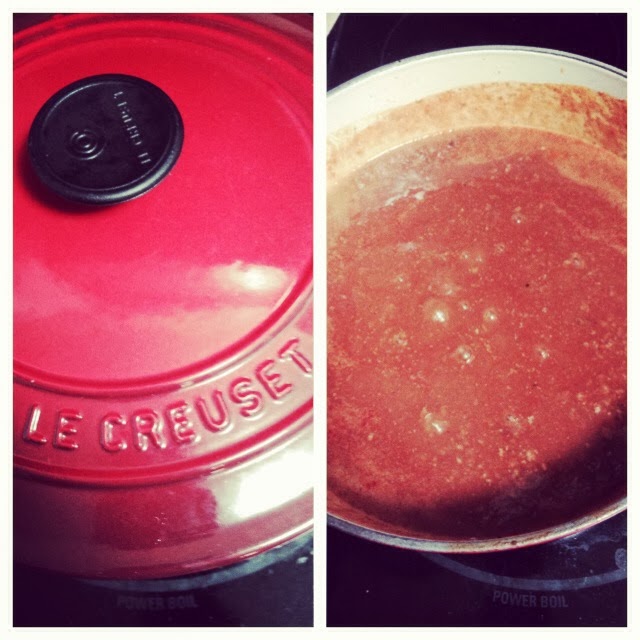
Brown your beef on med/high heat in either a cast iron pot or big pot of your choice. (Note: Chili stains everything. Get your scour pad ready and get some Madonna arms - without the veins. Or soak your pot afterwards if you want) Drain the fat. Side note: I wish so badly my dog was not allergic to everything, otherwise, because of all this snow on the ground I would make her a doggie snow cone with a touch of beef fat….but alas, bad idea and a terrible clean up later on.

Back to the chili:

Add chili powder to ground beef for a couple of minutes and let all the spices incorporate to make it extra delicious. What does adding the spice at this time do? Who knows, and who cares!? It makes it taste good, okay?

Add in the rest of the ingredients. Stir together until all combined smoothly. As for the S&P, I do a couple of twists on each grinder and have not been disappointed. Don't add too much salt please. Hold back…I'm guilty too! Just don't over salt it! Read: Don't ruin this chili. I bring to a bubble and then turn down the heat to low/simmer and cover for 2 hours.

Make it bubble like this. Then turn down the heat. 


I usually serve with mild or sharp shredded cheddar sprinkled in
and some soup crackers on the side.

One of these days I want to try to make chili with peanut butter (a la Damaris). SO wondering how that would taste.

P.S. AND one day I will get a nice camera and show you how to make delicious AND purdy food. For now, deal with my iPhone pics. Plus, if you are reading this, you know I am a beginner.