Navigation

Showing posts with label comfort food. Show all posts

Friday, January 30, 2015

Valentine's Day Dinner Ideas


Every year on Valentine's Day, my husband and I get fancy with cooking up a delicious meal at home. This year is the same! I am glad it is on a weekend this year, so I can take my time cooking and sipping wine in my loungewear and new apron (thanks, Miranda!). I have been perusing blogs and links for some recipe ideas. We like to do steaks with a great side or two, with an awesome appetizer to start. Each year it seems the meal gets better and better!!!!

Plus, when you go out to eat on VD there sometimes is a fixed menu. Fix your own menu!

One of my favorite pics!


Some links I am loving:


Beautiful Potatoes - How impressive are these? Probably so easy!

IMG_8486


Some appetizer ideas I have stumbled across:


HOLY CRAP THESE LOOK SO GOOD!


These are just a few I have been drooling over. Now to choose which ones to make. :-P

What are your Valentine's Day plans?

Monday, September 22, 2014

Shrimp and Weisenberger Grits

Do yourself a huge favor and make this soon. Perfect comfort food for fall, a great "date night at home", or just because you feel like being fancy. These shrimp and grits were one of the best meals I've ever made, and it only took right around 30-35 minutes to make.


I started off frying off bacon, both for the topping and grease to fry the shrimp in. Everything is better using bacon grease - pancakes especially. Drain the grease off into a container on the side and move pan off the heat. I used a cast iron skillet for frying but you can use whatever your heart desires.

Once I fried up the bacon, I got started on the grits. The package of grits gives standard directions - 4c water to 1 c grits. In my grits, I used 2 cups milk (2% but any will work) and 2 c chicken stock. This is a magical combination. Bring the 4 c of liquid to a simmer then add 1 cup of grits and 1 clove of garlic chopped -the garlic will soften with the grits. Bring to a boil then immediately lower the temperature to low/med. You want to keep an eye on these stirring frequently, and cooking for about 25 minutes. You will feel them tightening up as you stir.  Around 20 minutes in, I covered the grits and let them cook for the last 5 minutes covered up. Remove from heat and add 1/2 c heavy cream and 1 c parmesean cheese (I used grated). You can really use whatever cheese you want. The grits should be thin, but not runny.  To keep warm, you can cover or keep on low heat.  I stirred in a handful of spinach last that wilted down while I cooked the shrimp.

Last step is to cook your shrimp (takes 3-4 minutes).

The only things I seasoned my shrimp with are Old Bay and tabasco sauce. Generously coat your shrimp - you don't have to add salt or pepper since it is in the Old Bay seasoning already.  Pour a little of your reserved bacon grease on the cast iron skillet, and bring heat to medium. Put shrimp on and cook for about 1 1/2 minutes per side or until pink.  Make sure not to overcook your shrimp, because they will also cook a little bit longer when you put them in the hot grits.

Toast up a baguette, top with chopped bacon, and dig in!

Recipe:


Grits recipe from Grits and Greens in Mastering the Art of Southern Cooking by Nathalie Dupree

The Grits:
2 c milk
2 c chicken stock
1 garlic clove
1/2 c heavy cream
1 c grated parmesean
1 c yellow grits (I used Weisenberger)
1 c baby spinach

Bring 2c milk and 2c chicken stock to simmer, add grits and garlic. Cook for 25 minutes, stirring frequently. Cover with 5 minutes to go.  After 25 minutes, stir in heavy cream and cheese. Add more heavy cream if consistency is too thick. It should be loose but not runny. Add salt to taste if desired. Stir in spinach and set aside.

The Shrimp:
1 lb 40-50 shrimp - peeled, deveined, tails off, thawed
2 tbsp Old Bay seasoning
1 tbsp tabasco
4 slices thick cut bacon

Cook bacon and reserve grease - drain bacon on paper towel lined plate.
Bring skillet to medium heat with 2 tbsp bacon grease.
Season shrimp with old bay and tabasco
Place on skillet and cook 1 1/2 minutes on each side until pink.

Pour grits into shallow bowl and add cooked shrimp in the center. Top with bacon and serve.


Serves 4.

Let me know if you make this soon and how you liked it!

Monday, February 10, 2014

Pot Roast

I love my pot roast. Joey loves my pot roast. My daddio loves my pot roast!

So here's how you make you and all of your favorite men and women in your life happy!!


The setup - See the pretty cabinets? ehhhhh.
Top: One big onion, 2 baking potatoes deeply scrubbed (no joke, get the sh*t off of them), baby bella mushrooms, S&P (duh)
Bottom: Carrots (i know, I slacked), celery, 3 lb chuck roast
Missing: Garlic (sorry, late memory)

The way to start it off: Preheat oven to 325. Heat your pot on Med/High while you chop up all of your veggies. You won't need to chop them fine…I do around 2 inch cuts. They get SUPER soft and delish when roasting so you really won't be disappointed. I just cut the onion in half, and sliced into chunks. Carrots- I cheated and bought pre-peeled and baby ones. So basically did similar sized cuts. SORRY!!!! The mushrooms were a suggested from Joey. (great suggestion, ps) Garlic should be chopped. It gets soft too so you won't be biting into big chunks when you are eating.


Step Uno: Pat your beef with a paper towel. It helps the searing process. Do it, don't ask questions!!!  S&P your beef. More than you think. Sear that sucker in your hot pan you have been heating up when you've been cutting up your veggies. 

Brown on both sides for about 7-10 minutes a side or when you can see there is a delightful crust of s&p on there…you will know.  Take the roast out of the pan and put on a plate to rest. I don't waste a good plate on it. Use a plastic plate or an ugly plate. Cooking isn't always pretty.


This tool is awesome to help you get the roast out to rest it before you add all the veggies.
See the purdy crust?


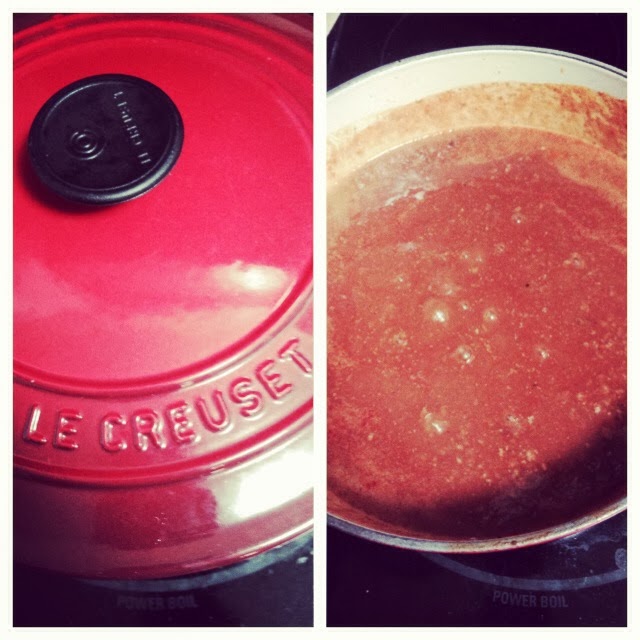
Once you pull out the meat - VERY important: turn heat down to medium/low and make sure to pour white wine or chicken stock (1/2 cup) into your pot to save all those yummy fatty beef flavors that stayed on the bottom of the pan. Then add all the veggies to your pot.


Once I put all of my veggies minus the potatoes in the pot, I realized there really wasn't room for the taters. This was kinda awesome because they are better roasted anyway….more on that in a second.

I took all the veggies out onto a plate after about 15 minutes of stirring, and getting a little browning on them...and then put my roast at the bottom of the empty pan, covered it with chicken stock (you can add any stock you want but that's what I had) and then added my veggies back on top!

Cover that sucker and leave it alone for 3 hours!


All the pretty veggies pre-roasted


Best way in the world to make sure you season your potatoes right: big plastic bag. I put my potatoes in the bag (cut them to about equal size), olive oil, rosemary, thyme, and s&p. Really, however much you want.  I do the same method with all veggies. Start small, then close the bag, throw it around, and see what distributed. Add more if you are feeling wild (:-) When there was 30 minutes left on my roast (after 2.5 hours the roast was already in the oven at 325) I put them on a pan and put them in the oven. They will be done at the same time your roast is.


After around 3 hours, your roast should be inventing your own candle scent to how great it smells in your house. But, alas, we all can't do that, so take the top off your pot,  break up the roast with tongs, and dish out as MUCH as you want! 


And that's all she wrote. You can plate it however you feel!


Errrr. Doesn't look like there is roast on there, but there is!! It's hidden behind all the delish veggies. Trust.

Sometimes I make gravy out of the drippings but did not tonight. Will share that later! It's still good with the drippings poured over your whole dish. Make sure you get all the goods on your plate. 

Tell me what you make in one pot!


Tuesday, January 21, 2014

Chilly? Chili.

It's cold.

Time to make Chili.

One of my fave wedding gifts. A clutch item in the kitchen.

I never have claimed any recipes on this website as my own and I don't plan on doing it anytime soon. I   like to follow them and happen to do it well.

#1 rule EVER and it's so important and everything ever that is pure and good in chili. Ground Beef. 80/20. Just do it. You skinnies on a diet - Run an extra 5 minutes tomorrow.  I asked J if he wanted chili and his response was "only if it's made with ground beef". Sometimes (that's a stretch) we are healthy kids around here but when it comes to this comfort food, you keep it the right way.

This chili recipe is taken from one of my mom's BFFs, Margie. Its DELISH and doesn't need noodles. It's its own star of the show.

You: "What's Margie's secret!?"
Me: Bloemers

There is chili paste and chili powder in the Bloemer's line that is a must have. Also, when picking up ingredients don't forget the soup crackers (oyster crackers). Fun touch and always necessary for some crunch.

The Lineup

You're gonna need:

2 lb ground beef
2 cans mild chili beans (I prefer Brooks, but generic are fine)
1 packet  or 2 oz Bloemer's chili powder
1 8 oz package of Bloemer's chili paste/base
2 15 oz cans Hunt's tomato sauce
According to my dad - 3 chili bean cans of water (best kind of measurements)
S&P
Shredded Cheddar for topping
Optional: Chives and Sour Cream (I don't use these but if you want to, be my guest!)


Brown your beef on med/high heat in either a cast iron pot or big pot of your choice. (Note: Chili stains everything. Get your scour pad ready and get some Madonna arms - without the veins. Or soak your pot afterwards if you want) Drain the fat. Side note: I wish so badly my dog was not allergic to everything, otherwise, because of all this snow on the ground I would make her a doggie snow cone with a touch of beef fat….but alas, bad idea and a terrible clean up later on.

Back to the chili:

Add chili powder to ground beef for a couple of minutes and let all the spices incorporate to make it extra delicious. What does adding the spice at this time do? Who knows, and who cares!? It makes it taste good, okay?

Add in the rest of the ingredients. Stir together until all combined smoothly. As for the S&P, I do a couple of twists on each grinder and have not been disappointed. Don't add too much salt please. Hold back…I'm guilty too! Just don't over salt it! Read: Don't ruin this chili. I bring to a bubble and then turn down the heat to low/simmer and cover for 2 hours.

Make it bubble like this. Then turn down the heat. 


I usually serve with mild or sharp shredded cheddar sprinkled in
and some soup crackers on the side.

One of these days I want to try to make chili with peanut butter (a la Damaris). SO wondering how that would taste.

P.S. AND one day I will get a nice camera and show you how to make delicious AND purdy food. For now, deal with my iPhone pics. Plus, if you are reading this, you know I am a beginner.